Tuesday, April 7, 2009

Candling Day 9

Saturday, March 28, 2009
The eggs are rapidly growing! 9 out of 9 ducks are still alive! The eyes and definite body shape can now be seen through the shell while candling! The ducks move around, and swim in the egg while I’m candling them, and they react to light, and movement. You can see one of my super active eggs swimming around! If you look closely you can also see veins, and blood vessels floating around the embryo. Check out my video clip below....


Candling Day 7

Thursday, March 26, 2009
All bad eggs are removed so I can focus on my healthy eggs! I candled a few of my healthy eggs, and this is what they look like! The veins are starting to become thicker, and spread all the way across the egg. The embryo is the large dark spot on the left side of the egg!


Opening the Blood Ring Egg

Friday, March 27, 2009
I candled my possible Blood Ring egg, and it indeed is a blood ring with a dead embryo in the middle. The embryo was not visible until today. I checked several times for a heartbeat, or light veining but unfortunately there is neither. I’ve left this one longer because I confused another egg last October to be a blood ring. I was horrified to find a developing duck, with a heartbeat in the center of the so called “blood ring”. Now I know that if there is a circle with veins in the middle it is alive. If there is a circle of blood with no veins, it is a blood ring and already expired.

A “Blood Ring Egg” is an egg that is invaded by bacteria. The embryo dies within the first few days of incubation, and a thin ring of blood or bacteria is visible around the egg. Make sure to always wash, or sanitize your hands before touching your eggs. Sometimes eggs come in contact with bacteria before it even reaches human hands. You should never wash eggs after they are laid because it removes the natural oils the eggs have, and can block the eggs pores causing lack of oxygen, and humidity.
When I opened the egg it was very liquidy compared to the infertile eggs. The yolk seemed to have mixed with the egg white. There was no foul odor, but part of the yold appeared to look cooked. The embryo was red but had no definite shape to it. It looked as if soon it would have started to form into a duck shape. The embryo was more liquid than solid.

Opening the Infertile Eggs

Thursday, March 26, 2009
I collected the 7 infertile eggs, and opened them all one by one. They were indeed infertile. Some leave the eggs longer but it was obvious that they were infertile compared to the other developing eggs. If you are inexperienced, or unsure about any egg leave it unless it smells, or is secreting liquid! Any eggs that smell, or sweat should be removed as soon as possible.


Candling Day 6

Wednesday, March 25, 2009
Today is Day 6, I candled all eggs and 9 heartbeats are visible! The others are definitely 7 infertile, and one blood ring. I’m still giving them a few more days in the incubator in case of any delayed development.


Good Egg Vs. Bad Egg

Tuesday, March 24, 2009


Candling on Day 4

Monday, March 23, 2008

I quickly checked the development of a few, and they are growing!! I can see heartbeats, duck embryos, and veining!! I candled them all to check for fertility and out of the 17 that were set:
-9 appear developing
-7 seem infertile
-1 possible blood ring

I’m not 100% positive of the blood ring, or infertile eggs so I’m leaving them to incubate for a few more days. If there are no signs of development I am going to remove the bad eggs, and crack them open to see inside. I’ve read that people leave infertile eggs as long as 20 days, but when you are sure they aren’t fertile, there is no point in keeping them in the incubator. They can spread bacteria, or even explode which can contaminate every other egg in the incubator.

Here are a few quick pictures I snapped with my camera phone. The "C" shape in the middle of the veins is the Pekin Duck embryo growing!


Wednesday, April 1, 2009

Setting the Eggs

Thursday, March 19, 2009-
I set the eggs in the incubator after 7 hours of resting, and coming to room temperature! The eggs were rolling around when I would place them on the metal screen, and I didnt like this so I decided to use the egg carton method. I didnt have an egg carton to set them in so I cut toilet paper rolls in 4 and used them to hold the egg. They are on an angle, with the pointy end down. They must be placed with the point down because the air cell is on the large end of the egg which must be on top.


My beautiful Eggs!

Thursday, March 19, 2009-
After opening and inspecting the eggs I brought them to my room to rest, and adjust to room temperature for 7 hours. You are supposed to let them sit for 12-24 hours but I couldn't have them laying there that long. They were safer in the incubator.


My Eggs arrived!!

Thursday, March 19, 2009-
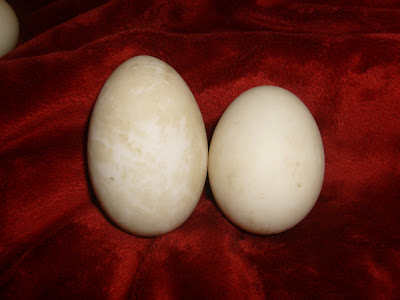
My eggs arrived today!! Early afternoon I was standing outside with my son and niece, and the postman unexpectedly hopped out of his truck and handed me a box! I thought UPS would ship it, and they usually come pretty late between 5pm or 6pm. We went inside, and began opening the eggs. The packaging was great! I've never seen so much packing peanuts, and bubble wrap in my life! The first one I unwrapped was huge! Originally I was expecting 12 eggs, and was surprised to have gotten 18! Out of the 18 only one had dented. It wasn't cracked open, but dented and wouldn't have survived. I opened it to find that it was sadly fertile too. There of course was no development, but a white spot that indicated it was indeed fertile.

My Duck eggs were shipped out!!

Wednesday, March 18, 2009-
I just got exciting news, my eggs were shipped and should be here by Friday!! I'm trading Graphic Design in trade for Pekin Duck Eggs! He is sending me a dozen, and emailed me that he included some extra in case any break during shipping! I cant wait to get them!! Im so nervous!

Today I am working on the humidity. The humidity has to be around 80% for duck eggs but my incubator is only holding around 40% so far. The water rings in the bottom alone arent producing enough humidity so I've added two plastic cups of water, and two most washcloths. The cups are on the left and right sides, and the washcloths are on the front and back sides. Now the humidity is 70%. It's still not high enough but I will mist the eggs after Day 6 which will increase the humidity.

Finally regulated!

Tuesday, March 17, 2008-
Yesterday I was having problems with regulating the temperature, and eventually got so frustrated that I just shut it off! Someone who uses the Little Giant regularly told me to turn the knob to the highest setting, and then slowly decrease it from there. Originally I was doing the opposite, I was slowly increasing it from the lowest setting. So I took their advice and turned the knob to the highest setting and left the incubator for a few hours. When I checked back the temperature was 120 degrees! I put my hand down on the outside, and the outer screw actually burned me! I opened the lid to let the hot air out, and lowered the knob about half way. After this I had the temperature set at 92 degrees, but I needed it to be 99-100 degrees. When I would turn the knob to higher the temperature, the temperature would drop instead. I couldn't figure out why the heat was decreasing rather than increasing. At this point I was sure I broke it! I shut it off before I went to bed, and figured I'd start over in the morning.

I have to operate the incubator upside down because I don't want the cord to hang down the front of it. When went to plug it in again the next morning I realized because of this I was turning the thermostat knob the wrong way! After realizing this I regulated the temperature to 99 degrees in about an hour!

Setting up the Incubator

Monday, March 16, 2009-
I read all the instructions Saturday night, and I'm setting up my incubator. I'm not sure when I will get my eggs but I'm firing it up to begin regulating the temperature, and humidity. This is my first time so it could take me a few days. I put it on top of my entertainment center in my bedroom. I figure it is the safest place, and out of reach of my two year old son.

My Journey Begins!

Saturday, March 14, 2009-
I got a Little Giant incubator for my birthday! I really wanted one, and finally got it! I cant wait to set it up, and start regulating the temperature and humidity! Im so excited!